System restore point on Windows enables you to revert your PC back to a period in time when it was working perfectly. This tool come in handy when you just added some apps or made some configurations that might have caused your Device to start misbehaving; lag or malfunction.
SEE ALSO: Best way to remove the Windows.old folder in Windows 10
This tutorial will enable you to create a System Restore point on your Windows 10 PC with a simple script so that you can easily initiate the process with a double-click whenever you are about to make some significant changes to your Windows 10 PC.
To start this tutorial, you will need to first of all check if System Restore Point is already enabled on your Windows 10 PC by following the steps below;
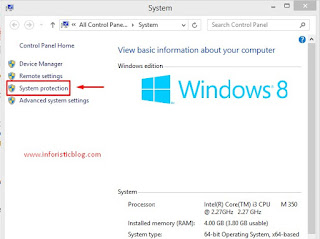
- Open the Start Menu > Search for Create a Restore Point and Press Enter OR Right-click the Windows icon on the task bar > Click Systems > then System Protection on the left pane.
 |
| System Properties |
- On the systems Properties page > Click System Protection, if the Settings is ON, just skip the rest of this segment to "How to Create System restore point Shortcut Script" in the next segment, otherwise follow the steps below to turn it ON
- If the system protection is OFF, click the PC system Drive, then the Configure button.
 |
| System Properties |
- Select Turn ON System Protection option
- Click Apply > Ok
 |
| System Protection Settings Window |
How to Create System Restore Point Shortcut Script
To Create a System Restore point with shortcut script on your desktop, do the followings;
- Go to your Windows 10 Desktop, Right-click - select New and Click Shortcut
 |
| Creating shortcut on Windows 10 Desktop |
- On the Create Shortcut window paste or type this command:
cmd.exe /k "wmic.exe /Namespace:\\root\default Path SystemRestore Call CreateRestorePoint "My Shortcut Restore Point", 100, 7" and Click Next
 |
| Create Shortcut Wizard |
- Name the Shortcut for example Create Restore Point then click Finish at the bottom of the Window. After doing these, proceed to the final steps below.
- Right-click the shortcut you just created on your Desktop > then select Properties.
 |
| Create Restore Point Properties |
- Select Run as Administrator
- Click Ok > Apply > Ok as seen in the screenshot below
- Now let's verify what you've done. double click the icon and after some seconds, it should like the screenshot below. If it doesn't display something similar, then you need to go through this tutorial again to check for mistakes.
I hope this was helpful, share and drop your questions and other contributions in the comments box below this post.
--AD--


Using script for system restore point is just like creating an app right?
ReplyDelete